ScrapQD’s documentation!
Introduction
ScrapQD consists of query definition created for scraping web data using GraphQL-Core which is port of GraphQL.js.
Library intends to focus on how to locate data from website and eliminate backend process of crawling. So people can just have xpath and get data right away.
It supports scraping using requests for traditional websites and selenium for modern websites (js rendering). Under selenium it supports Google Chrome and FireFox drivers.
ScrapQD library only uses lxml parser and xpath used to locate elements.
Getting Started
How to install
pip install scrapqd
How to run the server standalone
You can run scrapqd graphql server standalone without any additional code with below command. Flask is used as server and localhost.
python -m scrapqd
Flask uses 5000 as default port. You can change the port and host with below options.
python -m scrapqd --port 5001 --host x.x.x.x
ScrapQD
ScrapeQD consists of below components.
-
Query Type -> Document (consists of leaf type and group type)
GraphQL UI
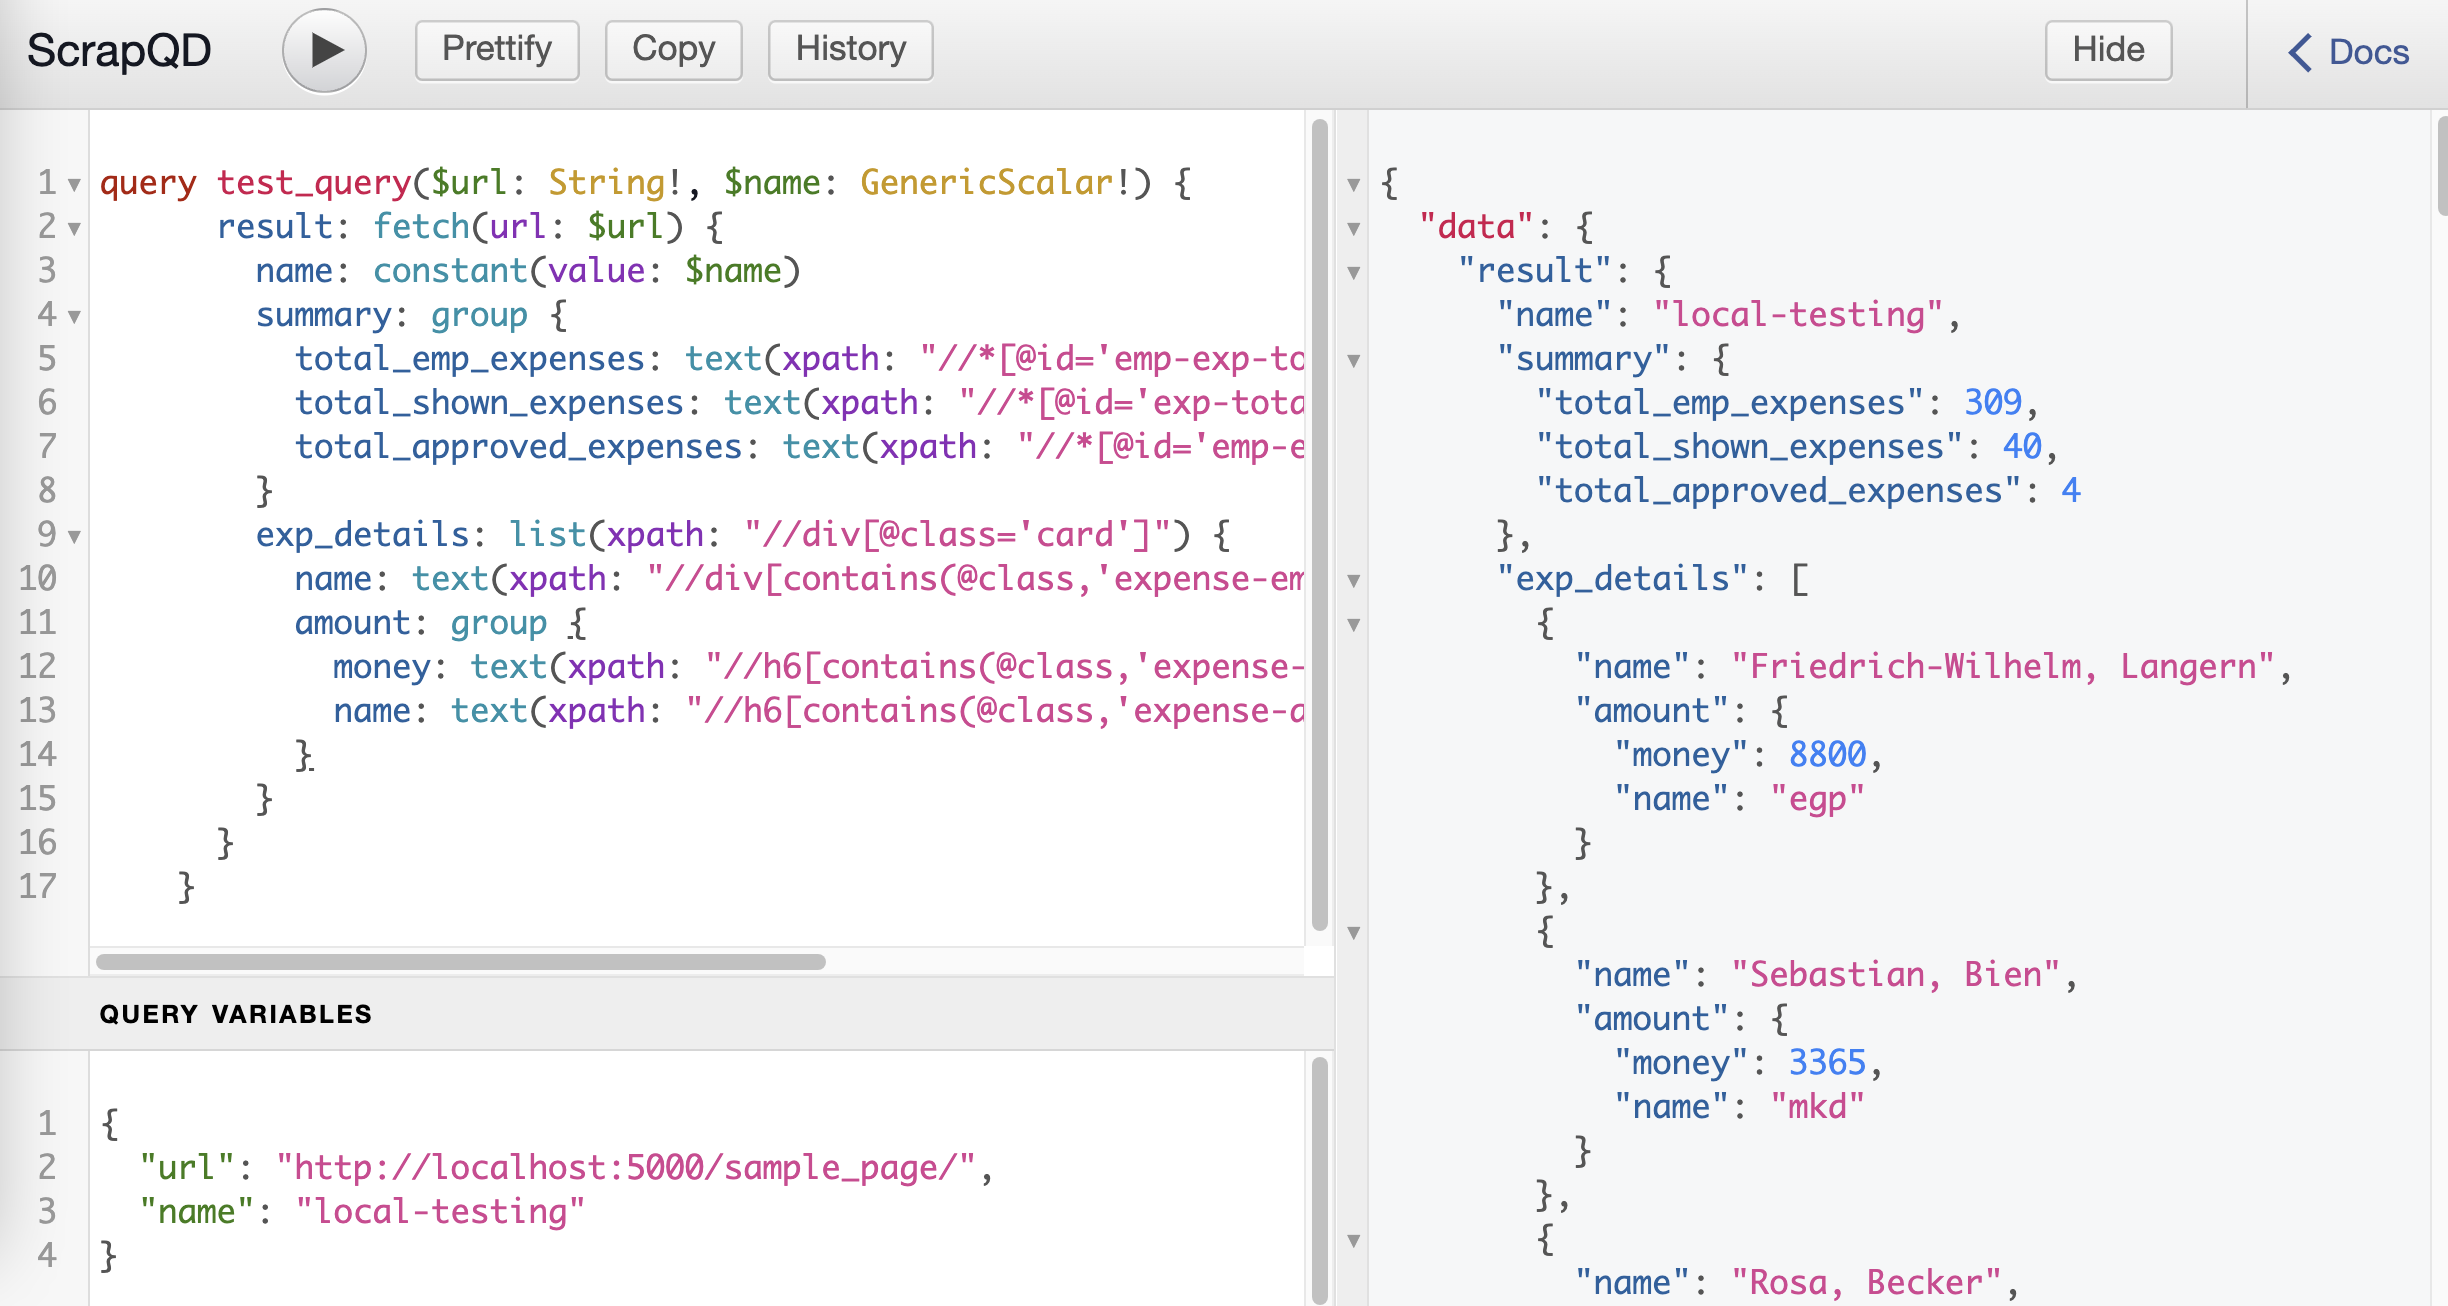
GraphQL UI provides flexibility to write scrapqd query and test it. GraphQL UI supports auto completion and query documentation to develop query faster. You can access UI - localhost.
UI is loaded with sample query and Sample page is accessible for practice.
You can pass custom template for the query ui.
History - to view past 10 queries that was tested.
Copy - Copy the content in the query window.
Prettify - prettifies the graphql query.
Show/Hide - Show or hides the result window.
Query Variables - query variables editor to pass data to query when you execute.
Executing with client
from scrapqd.client import execute_sync

query = r"""
        query test_query($url: String!, $name: GenericScalar!) {
          result: fetch(url: $url) {
            name: constant(value: $name)
            summary: group {
              total_shown_expenses: regex(xpath: "//*[@id='exp-total']", pattern: "(\\d+)")
            }
          }
        }"""

query_variables = {
    "url": "http://localhost:5000/scrapqd/sample_page/",
    "name": "local-testing"
}
result = execute_sync(self.query, query_variables)
Integrating with existing Flask app
Sample Flask app
from flask import Flask

name = __name__
app = Flask(name)

@app.route("/")
def hello_world():
    return "<p>Hello, World!</p>"
Integrating scrapqd with existing app
from scrapqd.app import register_scrapqd
register_scrapqd(app,
                 register_sample_url=True,
                 redirect_root=True)
app: Flask application
register_sample_url: False will not register sample page url to Flask application. Default is True
redirect_root: Redirect root url to graphql ui if this is set to True. This will not reflect, if there is already root route defined as above example.
Test (for development)
Clone the github repository
git clone https://github.com/dduraipandian/scrapqd.git
create virtual environment to work
pip3 install virtualenv
virtualenv scrapqd_venv
source scrapqd_venv/bin/activate
install tox
pip install tox
run tox from the project root directory
current tox have four python version - py37,py38,py39,py310
check your python version
python3 --version

# Python 3.9.10
once you get your version (example: use py39 for 3.9) to run tox
tox -e py39
FAQs
How to copy query from graphql ui to python code.
you can normally copy code from ui to python code to execute using client.
if you hav
regexquery, patterns needs to escaped in the python code. In such, use python raw strings, where backslashes are treated as literal characters, as above example.
How to suppress webdriver logs
If you see webdriver logs like below, set
WDM_LOG_LEVEL=0as environment variable and run[INFO] [97002] [2022-03-14T02:18:26+0530] [SCRAPQD] [/webdriver_manager/logger.py:log():26] [WDM] [Driver [/99.0.4844.51/chromedriver] ...]
How to change log level for scrapqd library
ERRORlevel is default logging. You can change this withSCRAPQD_LOG_LEVELenvironment variable.